Overview
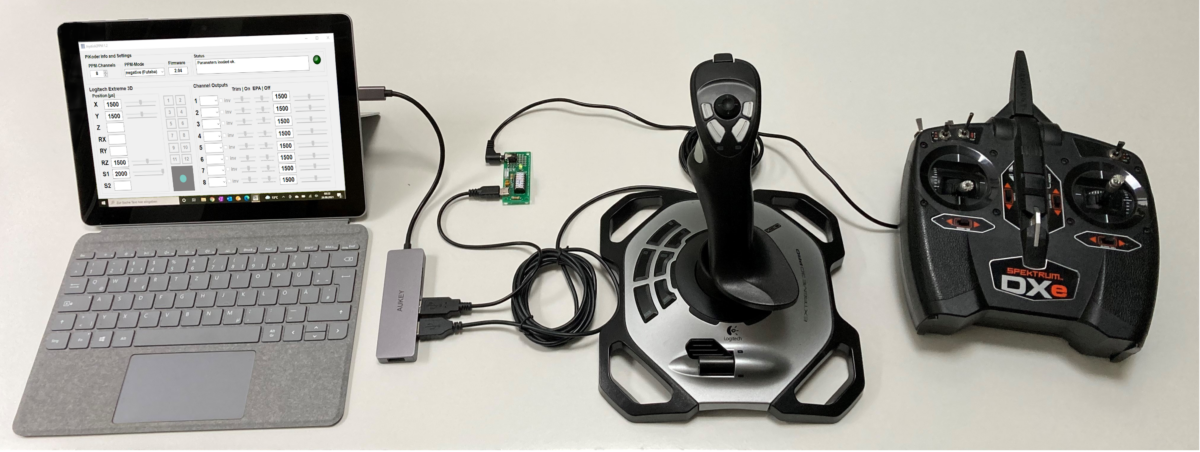
This article shows how a Spectrum DXe remote control transmitter can be used with the help of a USB2PPM adapter and a notebook to fly a quadcopter with a joystick.
The project includes the following steps:
-
- Preparation of the remote control transmitter
- Building of the USB2PPM Adapter
- Download the Joystick2PPM program
- Settings and commissioning
In addition to the remote control transmitter, PC or notebook with Windows 10, USB2PPM adapter and the joystick, a trainer cable is required to connect the remote control transmitter to the USB2PPM and a USB cable.
Preparation of the remote control transmitter
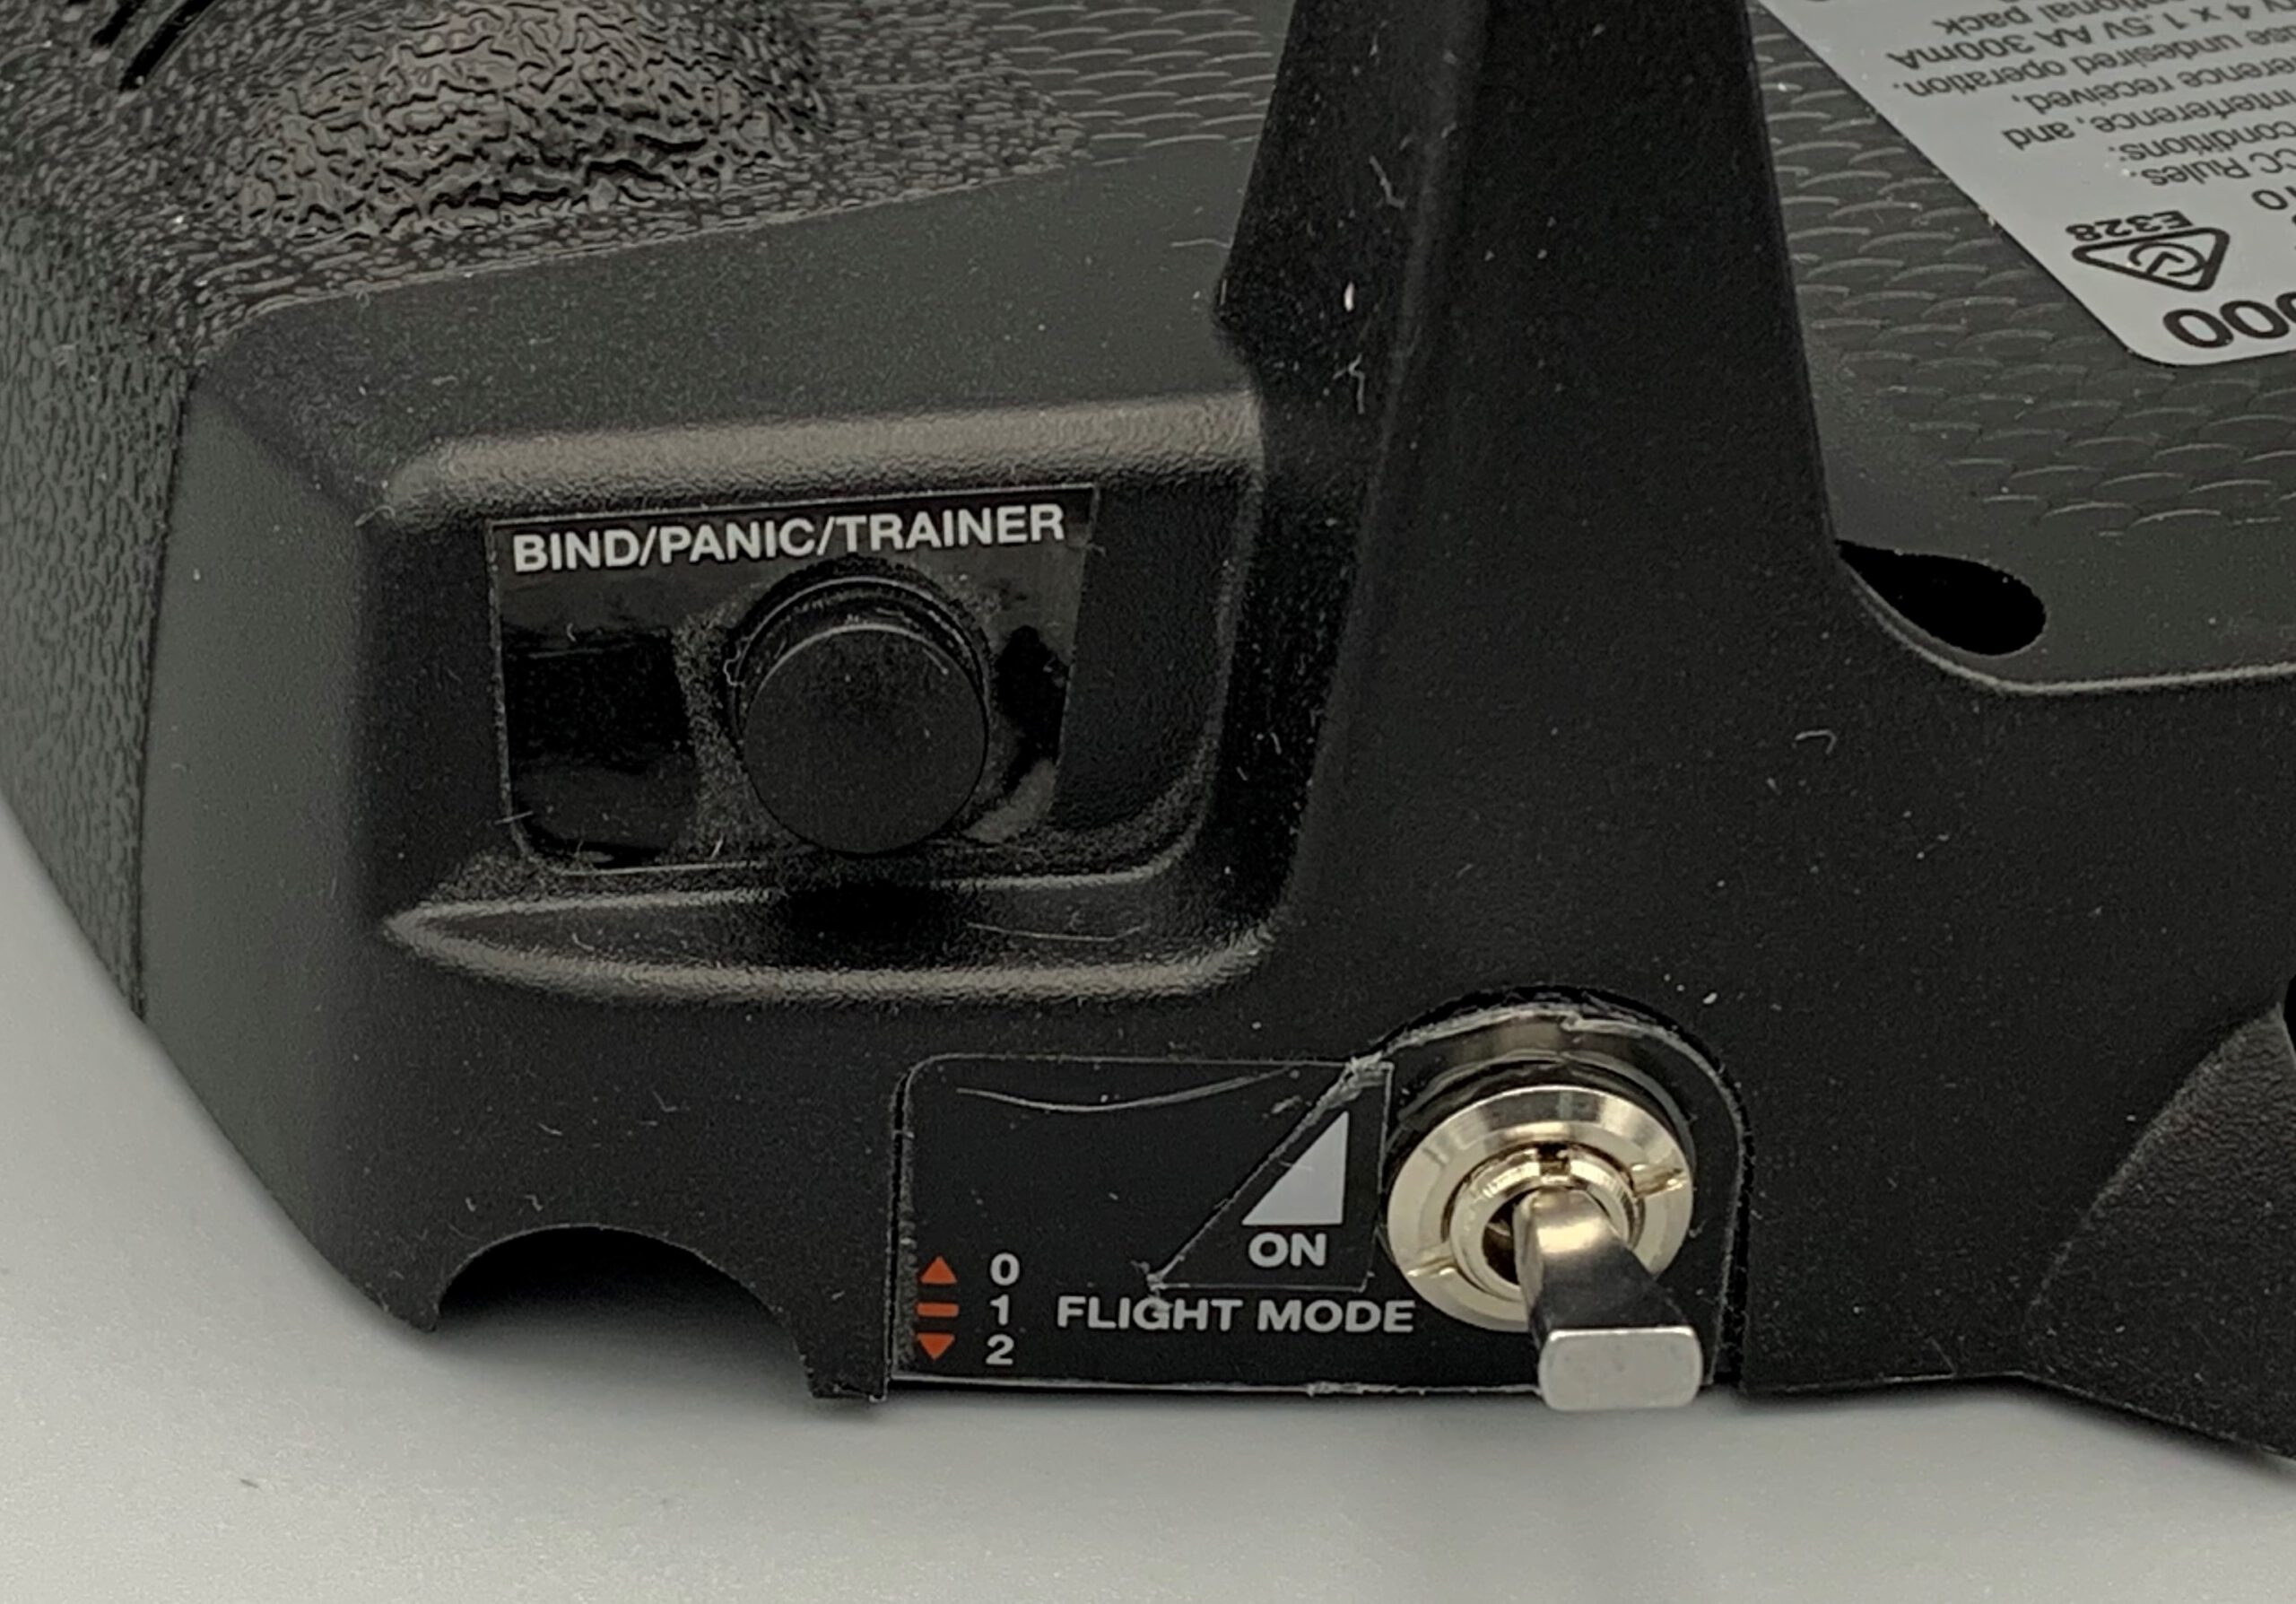
The spectrum DXe remote control transmitter is controlled by the teacher/student jack on the back of the transmitter. An external PPM signal can be fed into this jack – usually from a second transmitter, the student transmitter. The jack is a 3.5 mm standard jack and the cable connection is made via a corresponding mono-aux cable.
In order for the teacher to be able to take control quickly at any time, the student’s signal is only transmitted as long as the teacher pushes the bind / panic button. This practical implementation of the teacher-student operation naturally makes it difficult to take over the transmitter permanently, since you probably cannot or do not want to manually push the button down while flying.
Therefore, I have installed an additional switch in my Spectrum DXe in order to be able to permanently switch the remote control transmitter to student operation. Although the installation is simple, you should only consider it if you accept the likely loss of the warranty.
Installation of the additional switch for permanent student operation
The housing is opened as described in the manual. In the back half of the transmitter housing there is already a hole at the ideal position, which is covered from the outside by a sticker (see red arrow in the picture).
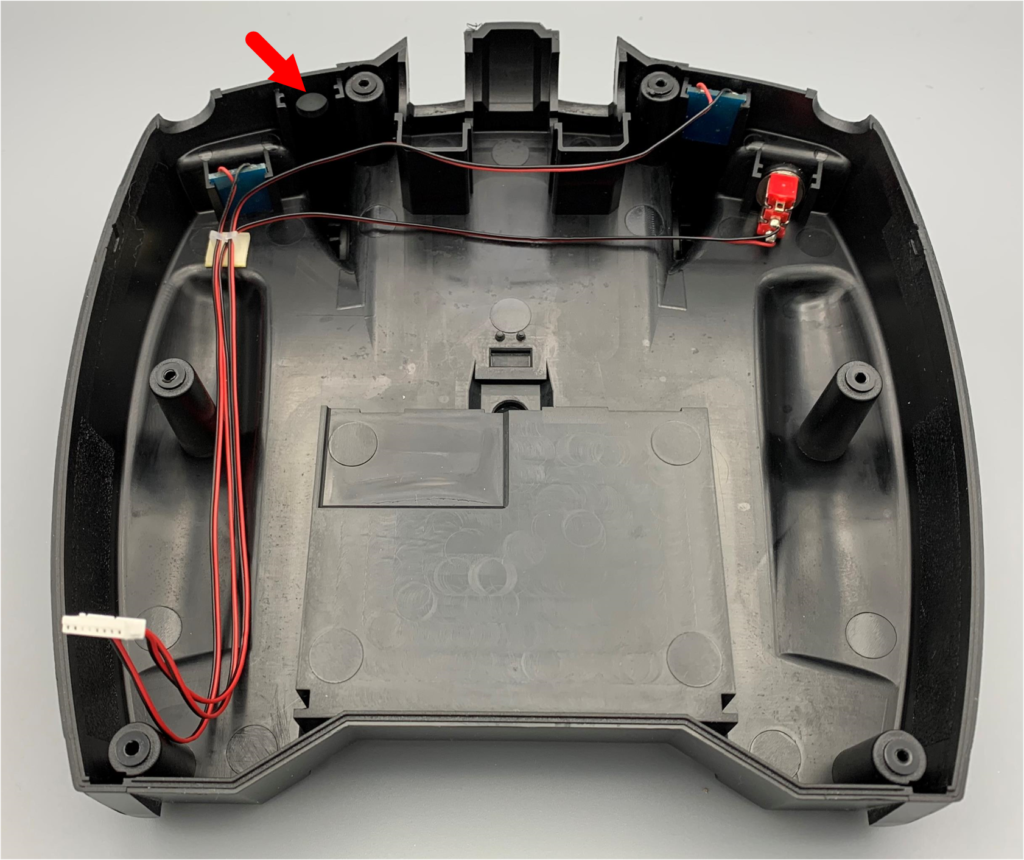
Expose the hole and insert the additional switch (see details).
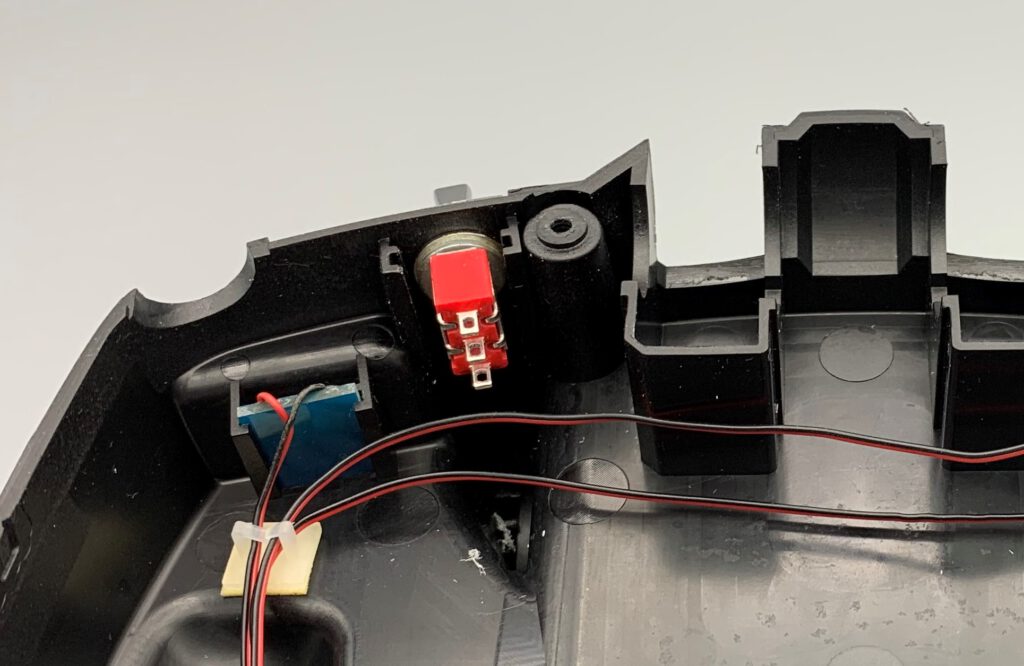

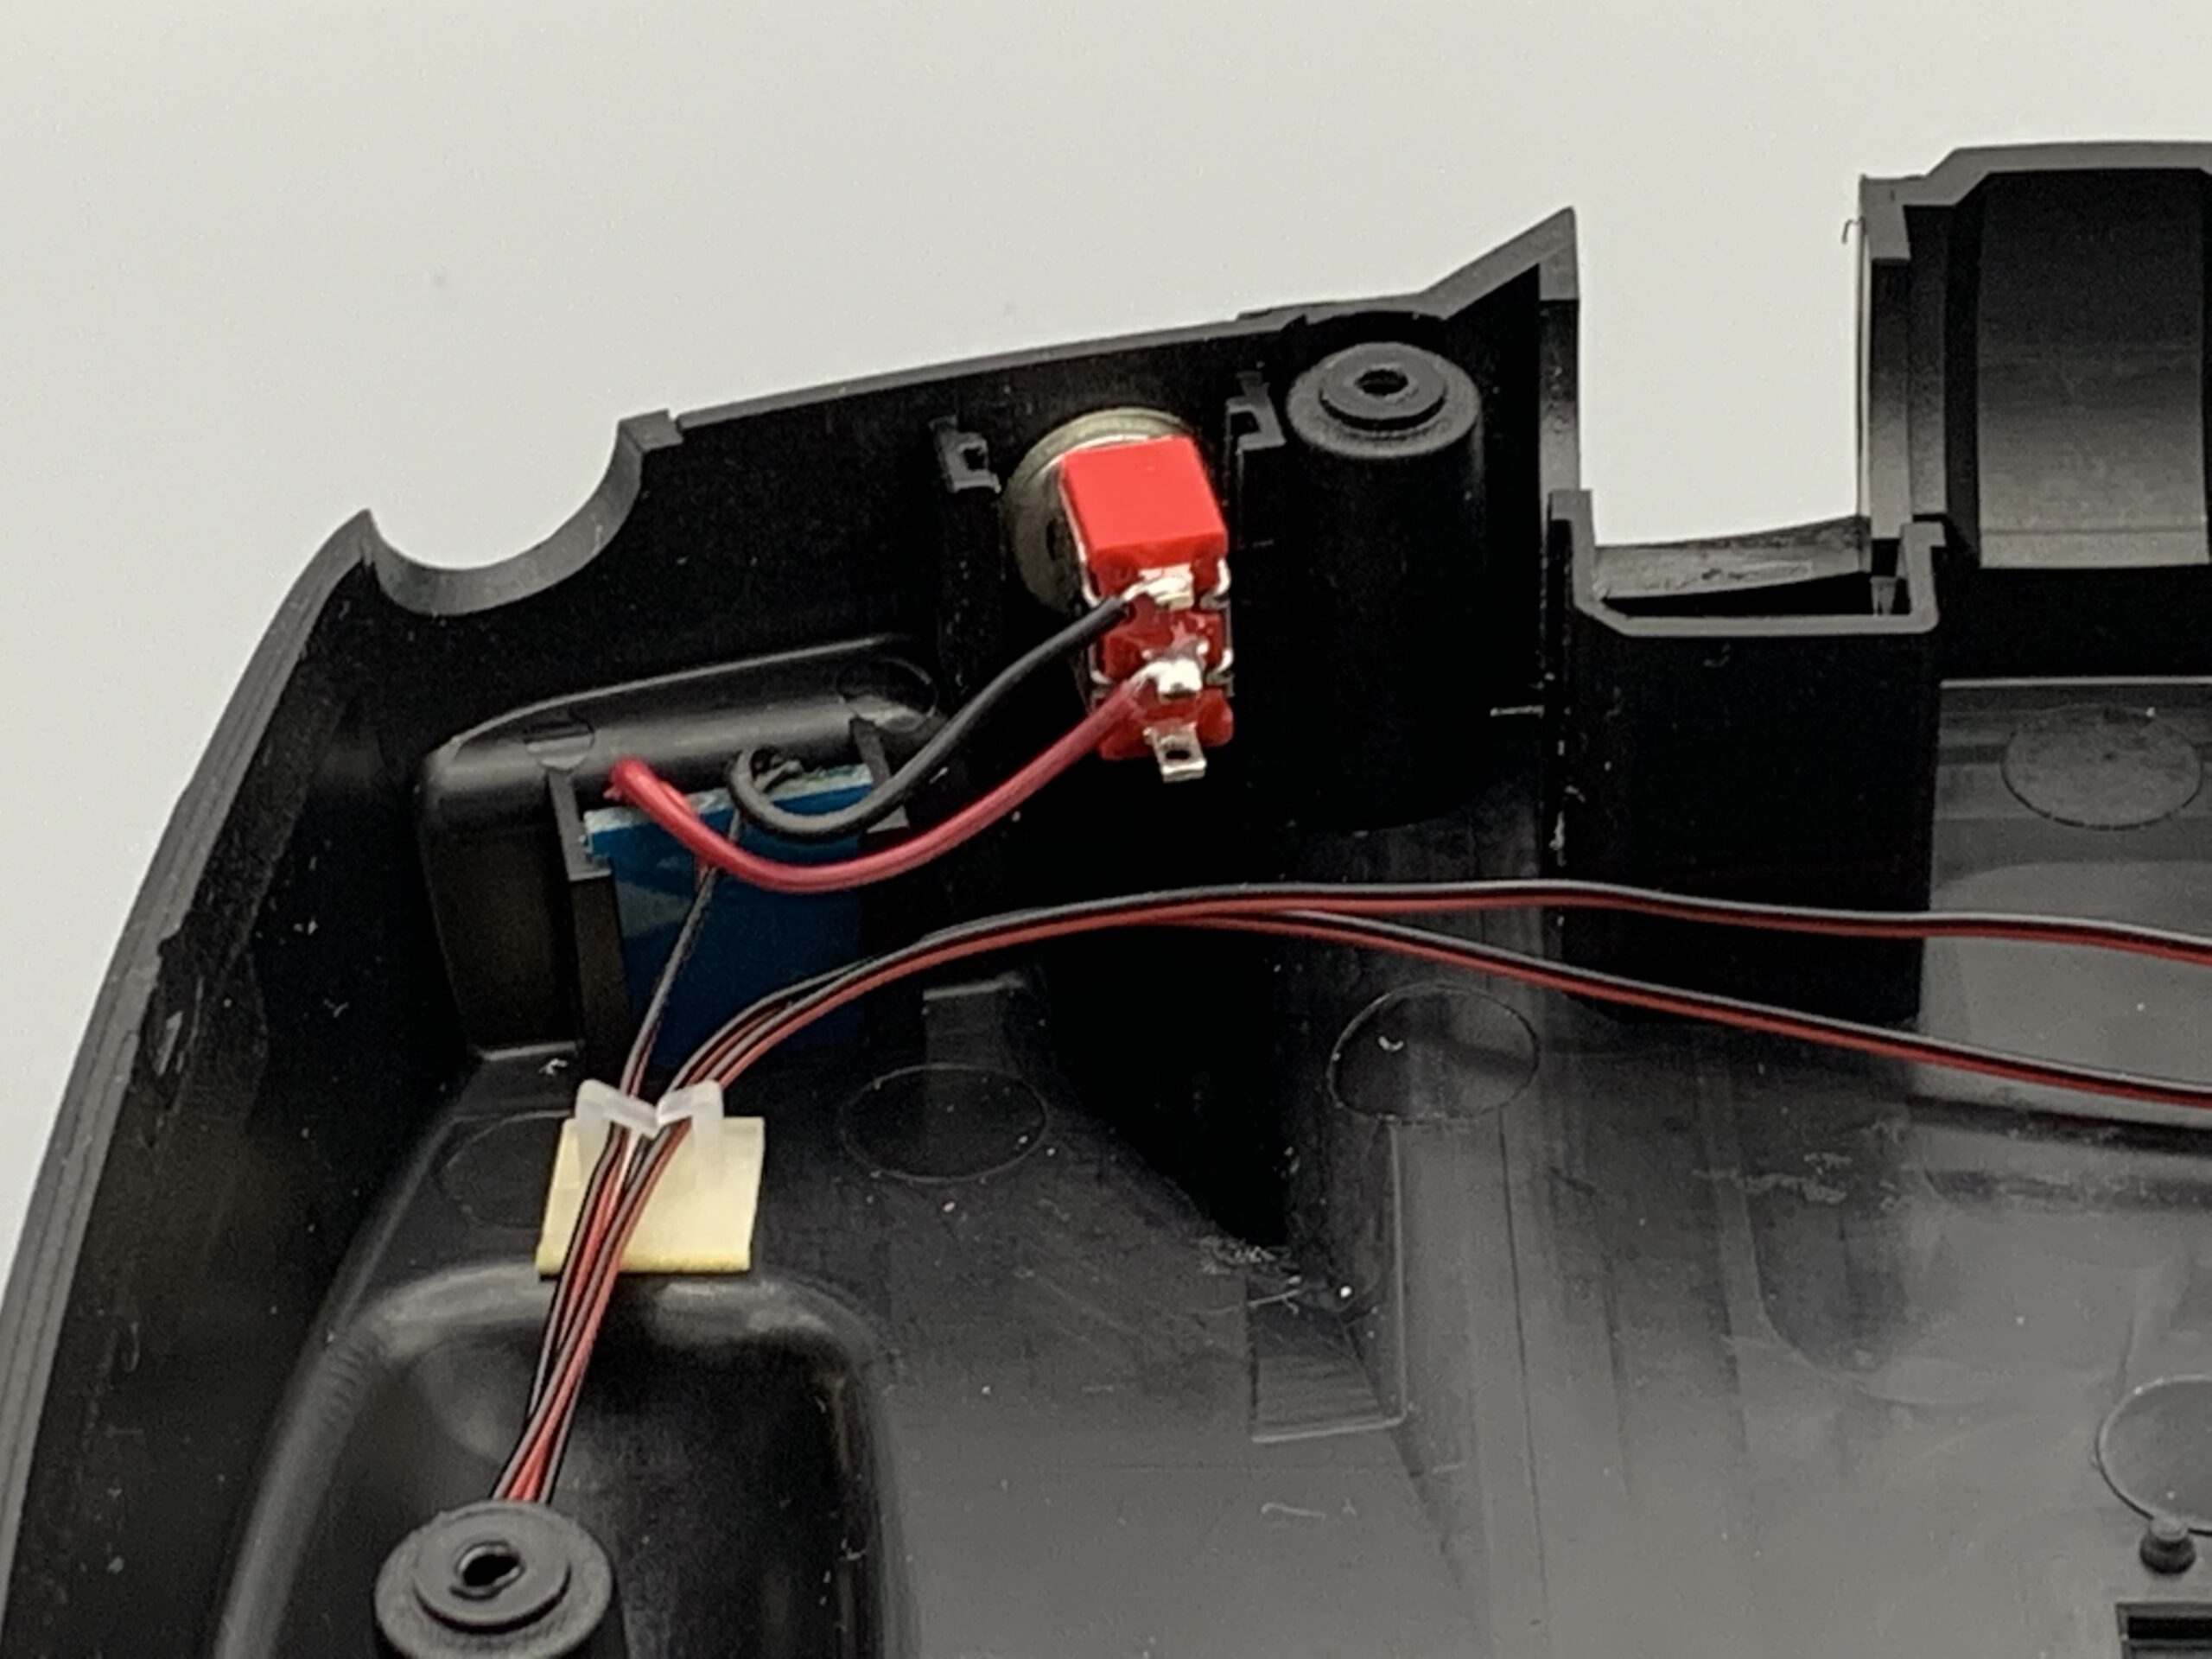
The wiring is done in such a way that the Bind/Panik/Trainerbutton is shunted (see picture). For this purpose, a short piece of wire is soldered to the small printed circuit board.
I then attached a small arrow on the outside so that I always know in which mode the transmitter would be currently (see picture).
Building of the USB2PPM Adapter
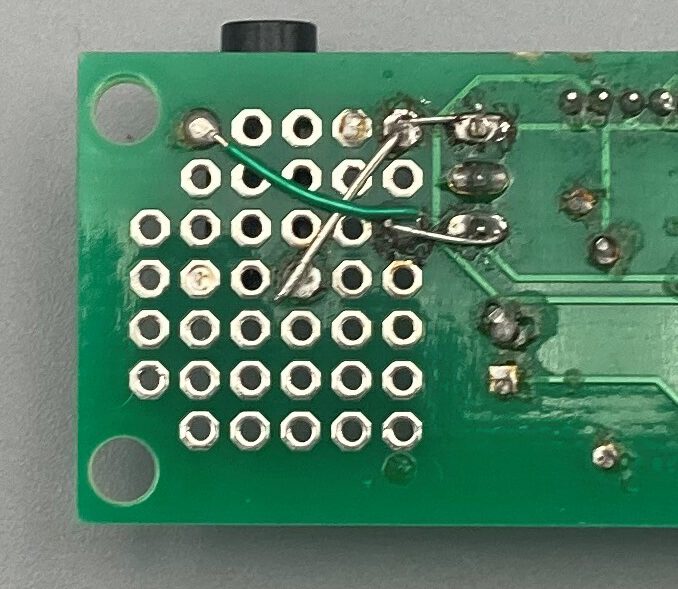
Of the USB2PPM is implemented according to the assembly instructions, but the last step is omitted (soldering in the three-pole PIN bar for the PPM signal). Instead, a 3.5 mm jack is placed in the experimental field of the printed circuit board (see pictures) to connect to the Spectrum DXe.
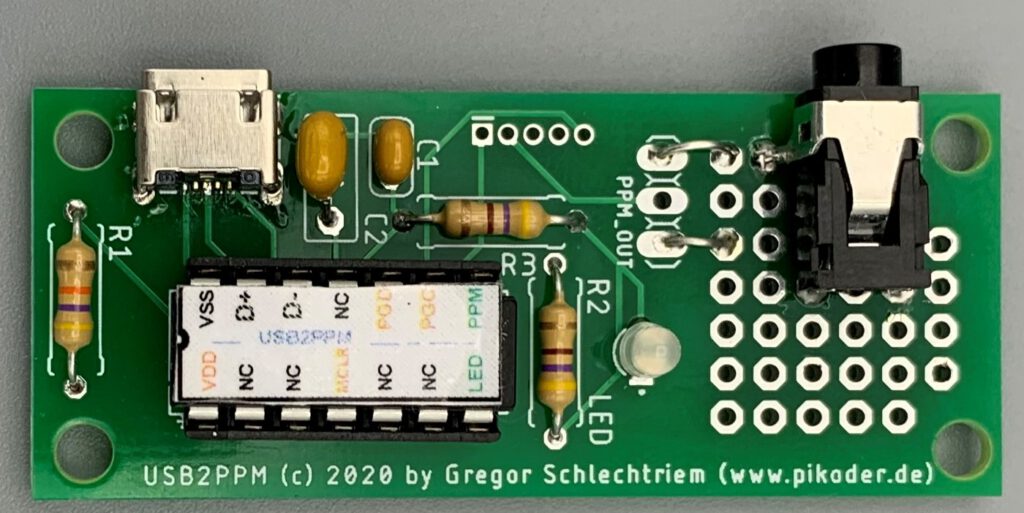
With this, all hardware bits and pieces for setting up the remote control are ready.
Download the Joystick2PPM program
The Joystick2PPM program takes over the evaluation of the joystick positions and the conversion into corresponding commands to the USB2PPM. This in turn generates the PPM pulse frame as an input signal for the remote control transmitter.
The Joystick2PPM program is free in Microsoft App Store available.
Settings and commissioning
Now connect the USB2PPM adapter and joystick to your PC. When connected for the first time, Windows 10 will automatically install drivers and associate the adapter with a COM port.
After completing the driver installation, start the Joystick2PPM program. The program automatically connects to the USB2PPM and the first joystick it finds and displays the available axes and switches on the left-hand side of the screen.
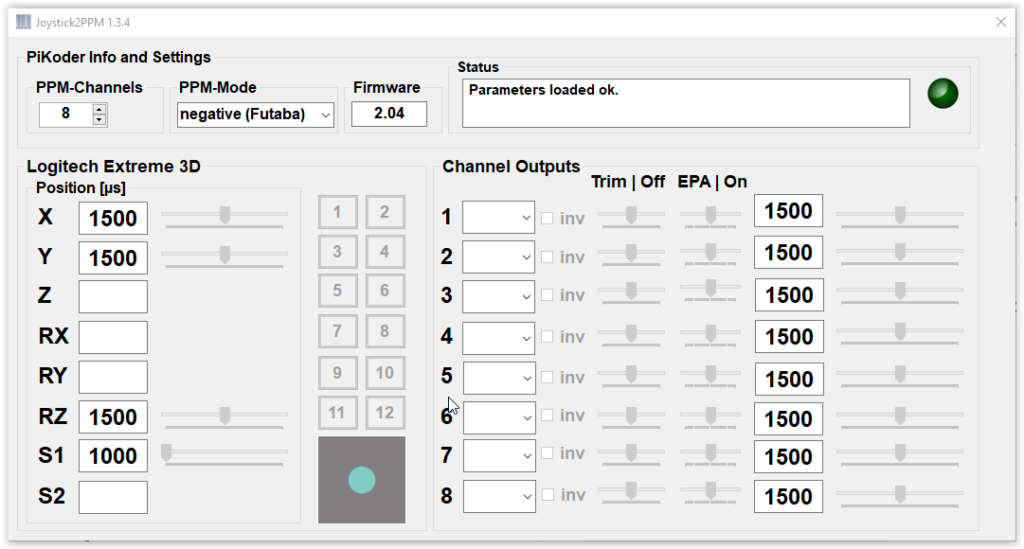
Now you can start to configure the channels for your application model-specifically.
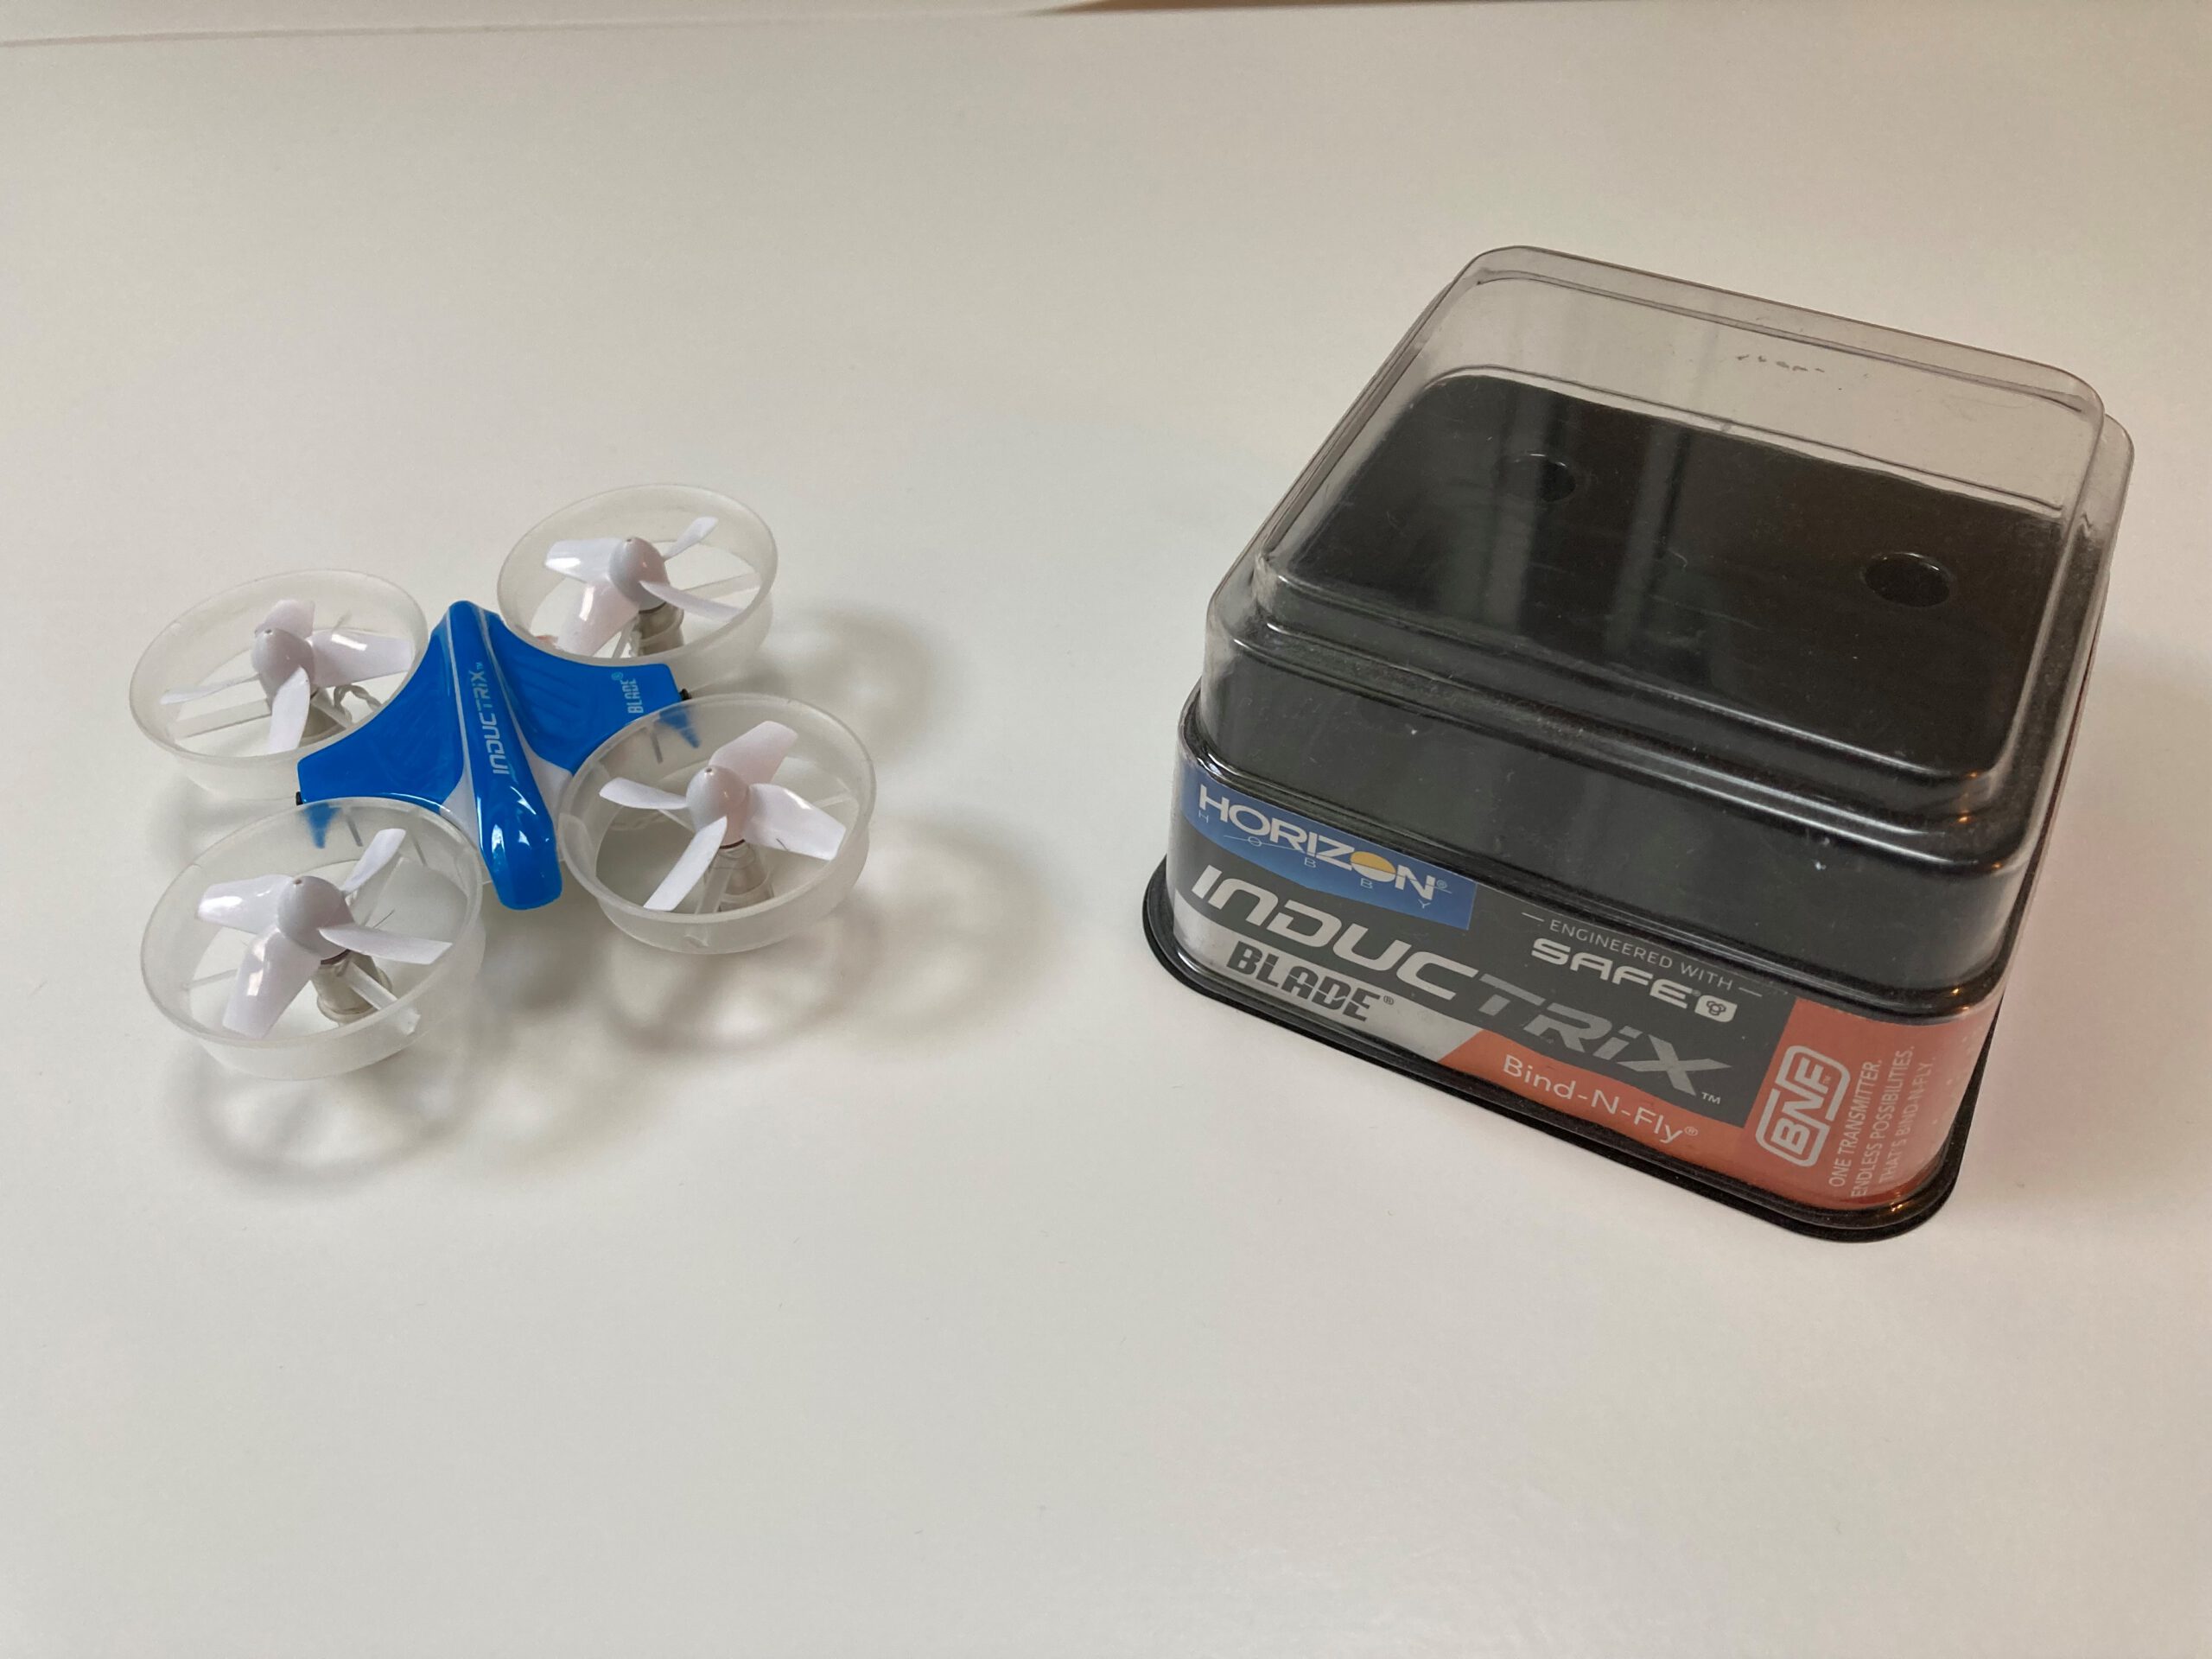
For this blog I have chosen a Blade INDUCTRIX quadrocopter as an example, but you can of course also connect other copters.
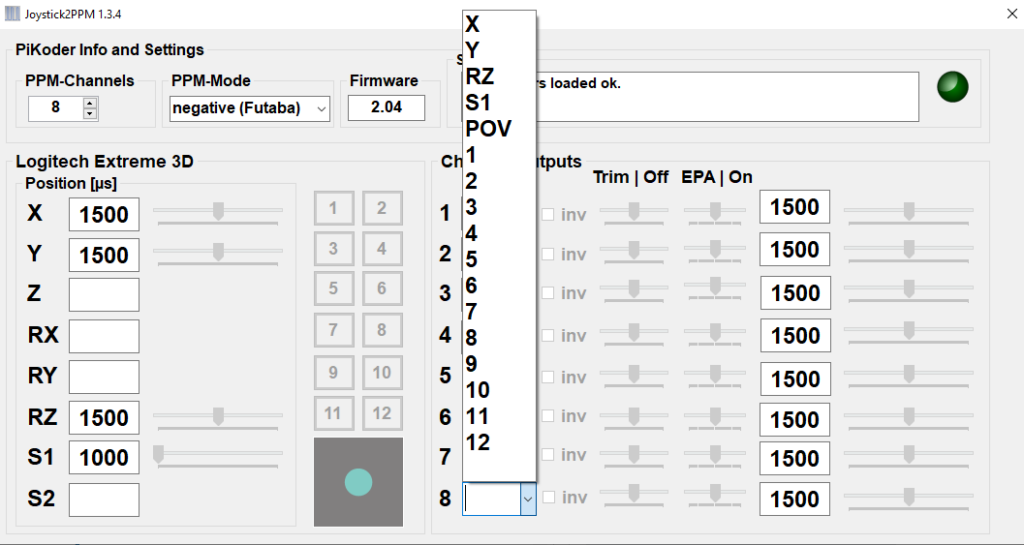
For configuration, assign the joystick controls to the individual channels of the remote control on the right-hand side (the instructions for the model may contain information on how to assign the channels). If you click on the selection box for a channel, all control elements that have not yet been assigned are displayed and you can make your selection for this channel by clicking on them.
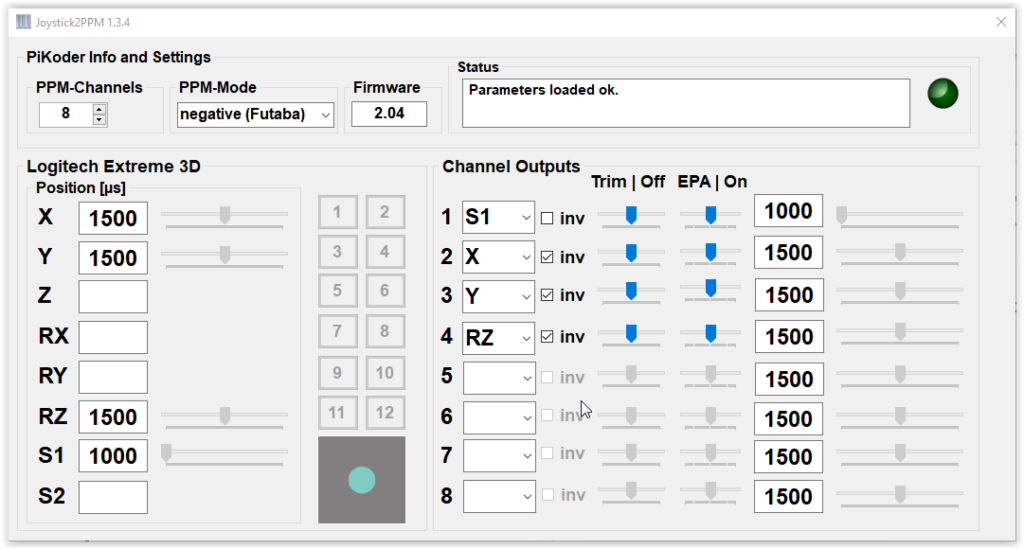
As soon as you have made an assignment, the current value for this control element is transferred to the right-hand side as the channel value. You can see the complete configuration for my application in the following screen dump.
Now turn on your transmitter and make sure that the transmitter is “paired” with the remote control model (trainer switch to “off”). Now, without turning off the remote control transmitter, connect the USB2PPM adapter using the training cable with the remote control transmitter. After turning on the trainer switch, you can remotely control your model with the joystick. If necessary, you can perform the trimming for the individual channels and a possible servo direction reversal on the PC.