DiddyBorg with QGroundControl – remote control joystick

In this blog I describe how I evolved the joystick / gamepad remote control of my RPI-controlled DiddyBorg to QGroundControl and MAVLink as communication protocol.

This has given me the basis to process more sensors in a standard environment in the future and to plan and execute missions for the DiddyBorg.

Software installation on the Raspberry Pi (RPi)

On the RPi, first install pymavlink, the Python version of the MAVLink libraries. The easiest way to do this is with PIP:

pip install pymavlink

After that you have to replace the module mavutil.py, because otherwise there will be no connection between the RPi and QGroundControl due to a pymavlink-issue. To do this, find the installation location of the pymavlink library with:

pip list -v  

Then replace the mavutil.py module with the version in the github repository for this blog. The new version is backward compatible.

Finally, create a directory, e.g. diddy2QGC into which you copy the Python modules diddy2QGroundControl.py and ThunderBorg3.py. In this directory you then start the Python script later with:

 python diddy2QGroundControl.py

Software installation on the desktop

Install QGroundControl on your desktop.

Starting the applications

Make sure the RPi and your desktop are on the same network and run QGroundControl (QGC) and the Python script (the order is irrelevant).
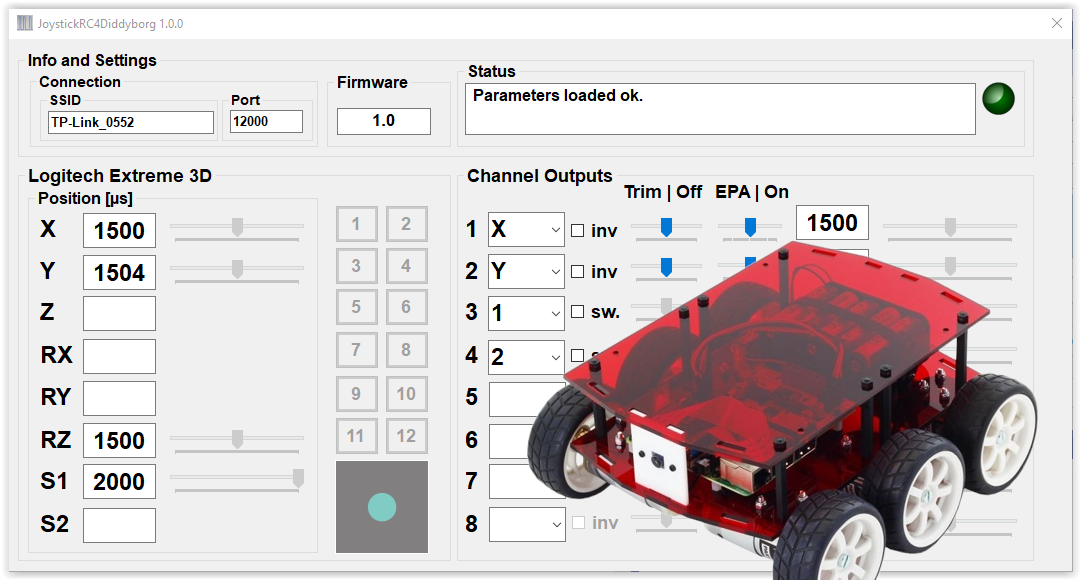
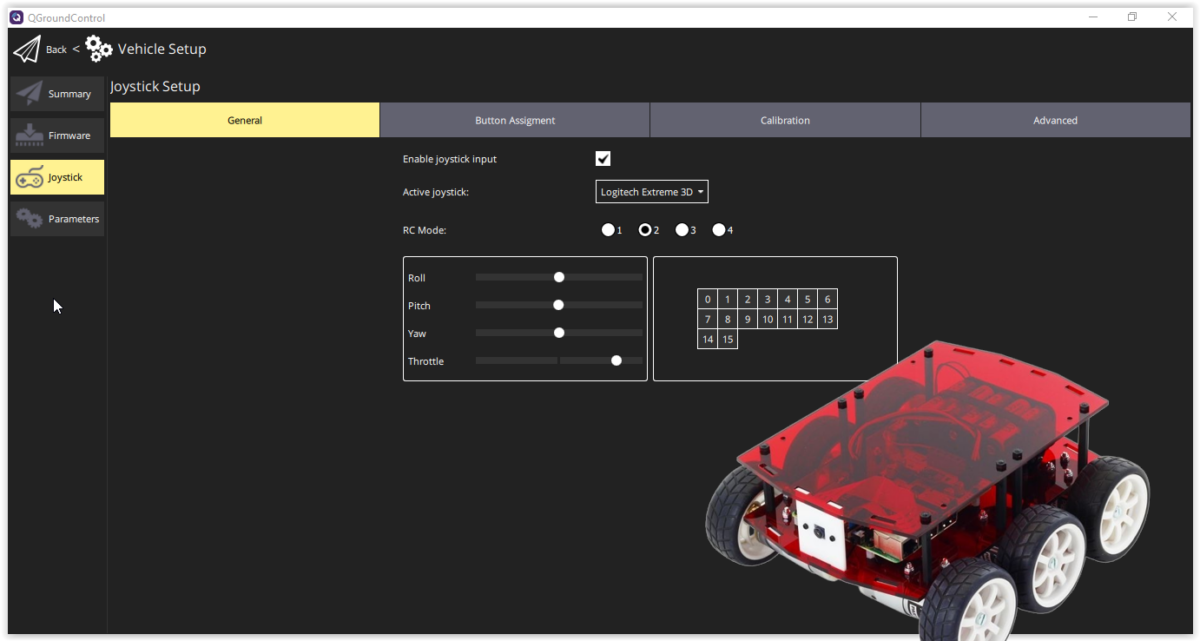
The DiddyBorg logs into the QGC and you will then find the option to teach your joystick in the Vehicle settings. Please note that diddy2QGroundControl.py in mode 2 uses the roll channel for right/left control and the inverted value of the pitch channel for motor control.

Remote control DiddyBorg with gamepad or joystick

In this blog I present my Windows app JoystickRC4DiddyBorg for remote control of the DiddyBorg (from PiBorg) with a joystick or gamepad.

The DiddyBorg sample programs published by the manufacturer PiBorg also include a Python remote control script with joystick, but it uses Bluetooth and therefore has a rather limited range.

The app presented here uses the existing WLAN and UDP as protocol to ensure sufficient agility of the remote control. For safety reasons, the time-out logic of the ThunderBorg motor controller is activated.

Software installation

The DiddyBorg needs a Python script JoystickRC4DiddyBorg as receiver, which you can find on github.com. In addition to the receiver program, you will also find a version of the ThunderBorg – Library for Python 3.x in the repository (the sample programs for the DiddyBorg are still based on Python 2.x).

The easiest way is to copy the two files additionally into the directory with the examples – then the script should work without further adjustments of path names.

On the PC side, install the Windows app JoystickRC4DiddyBorg of the same name, which you can get for free from the Microsoft App Store.

Operation

First start the Python script on the DiddyBorg. If you have a screen connected, then the program will log in and indicate that it is waiting for a client.

When you start the PC app, it will automatically search for a DiddyBorg with an active and compatible receiver on the local WLAN (to which both the DiddyBorg and the PC being used must be connected). If no connection can be established, a corresponding error message is displayed.

After the connection has been successfully established, the channels can be assigned to the various joystick axes and keys. Channels 3 and 4 are used as push buttons and allow for example fast / slow rotation (the function of the push buttons can be traced in the Python script).

The assignment of the channels is saved and restored at the next program start.